I still remember the first time I tasted Peppermint Creams. It was a chilly December evening, and my neighbor, a wonderful cook with a sweet tooth, handed me a piece of this creamy peppermint confection. That delicate balance of fresh mint and smooth cream melted in my mouth and instantly became something I wanted to recreate in my kitchen. From then, Peppermint Creams have been a staple not just in my pantry but in many real-life holiday gatherings and casual get-togethers.
Peppermint Creams are special because they bring that cool minty freshness together with a soft, creamy center—something both nostalgic and comforting. Whether you’re wrapping up the year with holiday peppermint candies or just looking for a simple treat to brighten a weeknight, these sweets make every kitchen feel welcoming. I’ve learned to rely on Peppermint Creams whenever I want a quick win—a reliable candy that’s both impressive and straightforward.
If you’re a home cook looking for a delightful, fuss-free peppermint confection to whip up, you’re in the right place. I’ll share everything from ingredients to serving tips so you can enjoy Cream-filled peppermint in your own kitchen with confidence. And for those who adore mint chocolate candy or other peppermint sweets, this recipe fits right in with those flavors you love. Plus, if you’re curious about adding a chocolatey twist, check out this handy Peppermint cream fondant recipe with dark chocolate to explore delicious variations.
What You’ll Need:
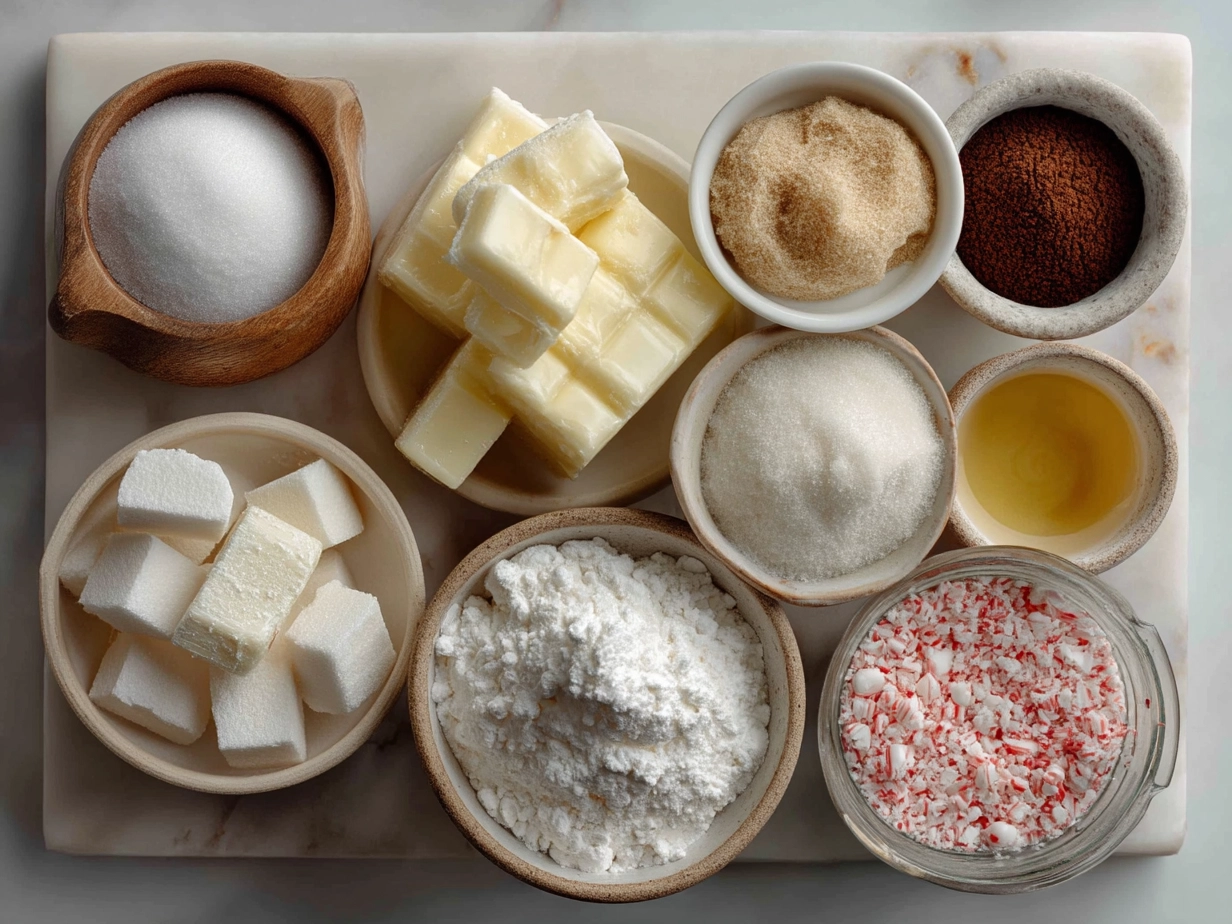
- 2 cups powdered sugar (Look for finely ground to keep your Peppermint Creams smooth.)
- 2 tablespoons unsalted butter, softened (If you’re out, margarine works in a pinch.)
- 3–4 tablespoons heavy cream (No cream? Whole milk can substitute, though it’s a bit lighter.)
- 1 teaspoon peppermint extract (You’ll find this over in the spice aisle or baking section—no fancy searches needed.)
- A few drops of red food coloring (Optional, for that classic peppermint look.)
- 1 tablespoon corn syrup (This helps keep your Peppermint Creams soft and not crumbly.)
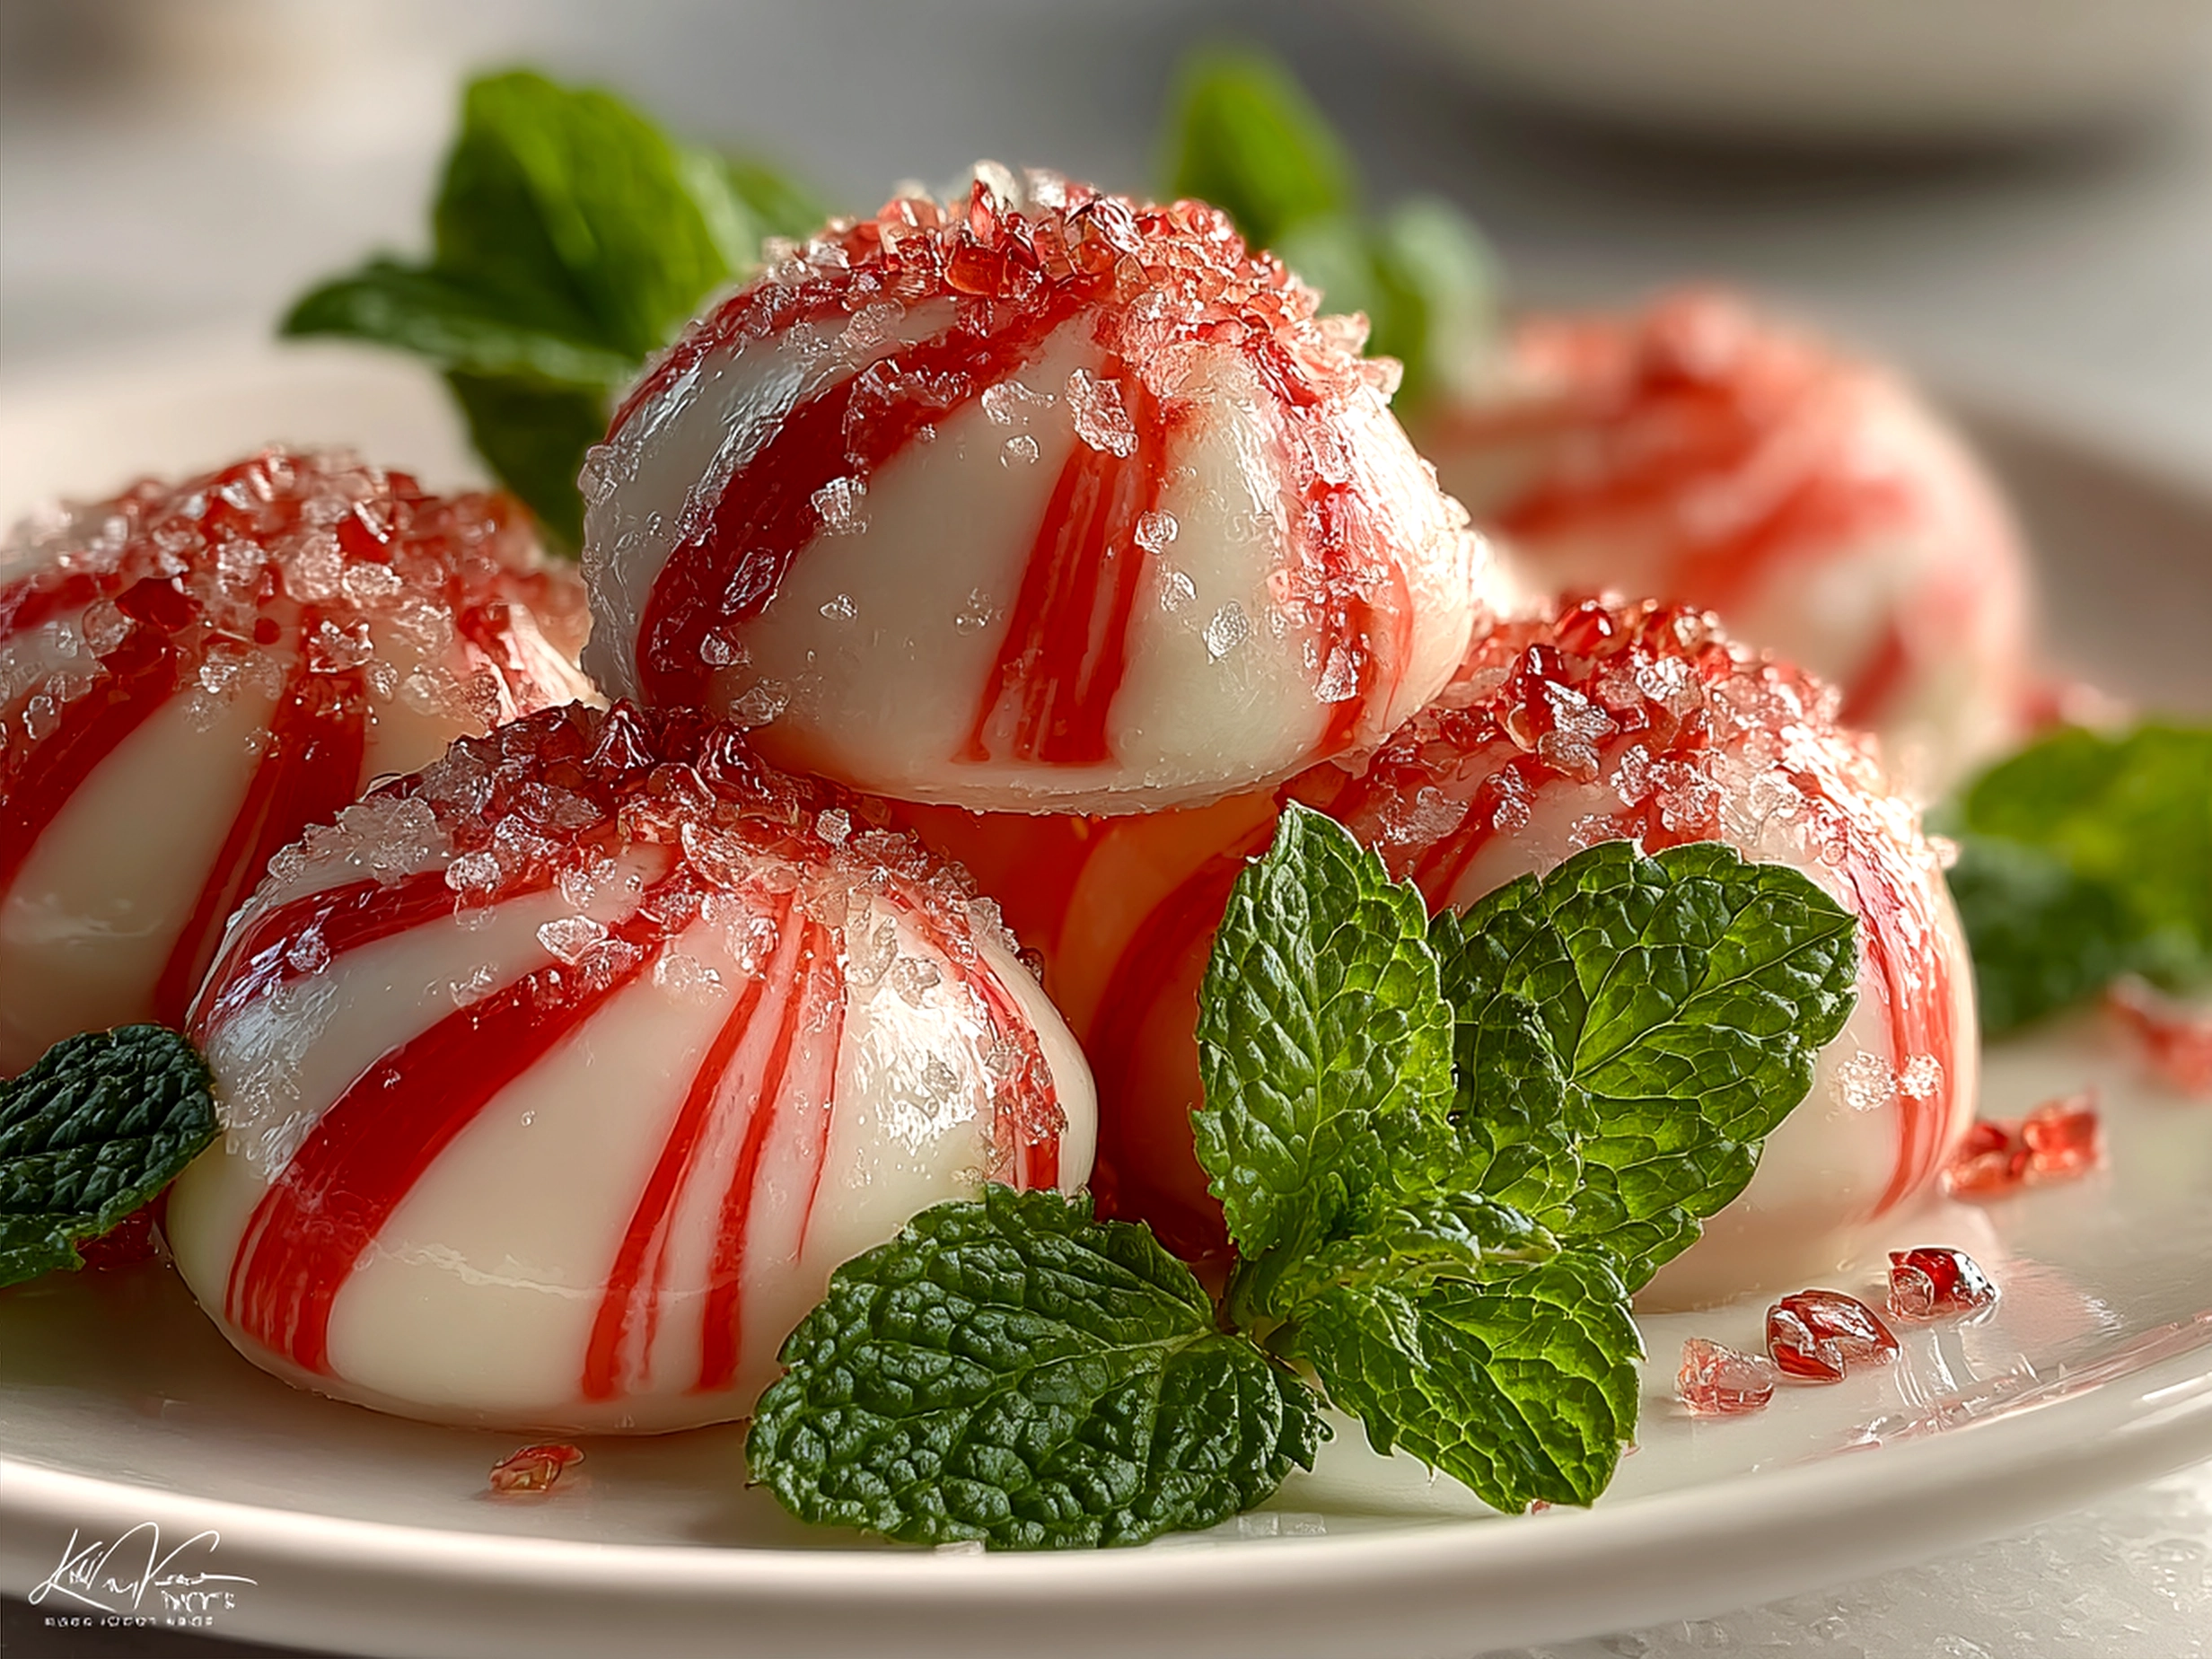
This Peppermint Creams recipe uses ingredients you probably already have—because good cooking shouldn’t require a special trip. The powdered sugar forms the sweet base, while butter and cream give that luscious texture. The peppermint extract is where the magic happens, infusing that minty flavor we all love. If you’re aiming for holiday peppermint candies, a little red food coloring makes it feel festive without fuss.
A quick tip: soften your butter well before mixing in. This little step makes your Peppermint Creams turn out creamy, not grainy. If you do have leftover Peppermint Creams, store them in an airtight container at room temperature for up to a week or pop them in the fridge if your kitchen is warm. For some inspiration, here’s another take on mint chocolate candy you might enjoy—visit Peppermint Creams – What A Girl Eats for a fun twist.
Let’s Cook It Together!
- Start by mixing your soften butter and powdered sugar in a large bowl. Use a wooden spoon or an electric mixer on low speed to combine them into a crumbly mix. This step sets the foundation for your Peppermint Creams.
- Add in peppermint extract and corn syrup. Give it a good stir; this is where your peppermint confection begins to smell like the holidays. If you love a stronger mint punch, add a tiny extra splash of extract.
- Slowly fold in the heavy cream, one tablespoon at a time. You want a dough that’s soft but not sticky. Your Peppermint Creams dough should roll easily without sticking to your fingers.
- If you want that classic look, gently mix in the red food coloring. Feel free to skip this if you love the pure white look. I sometimes make half with color and half without, and both get gobbled up quickly.
- Turn the dough out onto parchment paper and knead just a bit to fully blend. Then roll it into a log about 1-inch thick.
- Slice the log into small rounds, about ½-inch thick. This is your cream-filled peppermint ready to take shape.
- Let the pieces air dry for a few hours. This step seals the surface, so your Peppermint Creams won’t be sticky, and the texture stays soft and creamy inside.
- Store your peppermint sweets in a cool, dry place until you’re ready to share.
From start to finish, this Peppermint Creams process takes about 30 to 40 minutes active time, plus drying. While that’s happening, you can tidy up your kitchen or prepare a warm drink to enjoy alongside your mint chocolate candy later. Your kitchen will smell incredible when your Peppermint Creams is ready — that cool, fresh peppermint scent is impossible to resist.
If your Peppermint Creams looks a bit crumbly, don’t worry. Adding a touch more cream or corn syrup usually smooths things out next time. I used to rush the drying part, but patience there makes all the difference in a soft, satisfying treat.
How to Serve & Enjoy It!
This Peppermint Creams recipe shines when served alongside a cozy cup of hot chocolate or a coffee with a splash of cream. The cool mint contrasts perfectly with the warmth of the drinks, creating a little moment of joy.
I often bring a plate of peppermint sweets plated simply on a festive serving dish during the holidays. For casual gatherings, I lay them out with other holiday peppermint candies for a mint-themed treat table that guests love.
Another favorite is pairing Peppermint Creams with brownies or cookies that have chocolate chunks. The mint chocolate candy flavor lifts the richness and adds a fresh twist. If you want to brighten up a casual weeknight, try them as a sweet finish after a simple meal.
Got leftovers? Freeze your Peppermint Creams in an airtight bag and pop a few out when the craving strikes. They thaw quickly at room temperature and are perfect to add to an impromptu dessert tray.
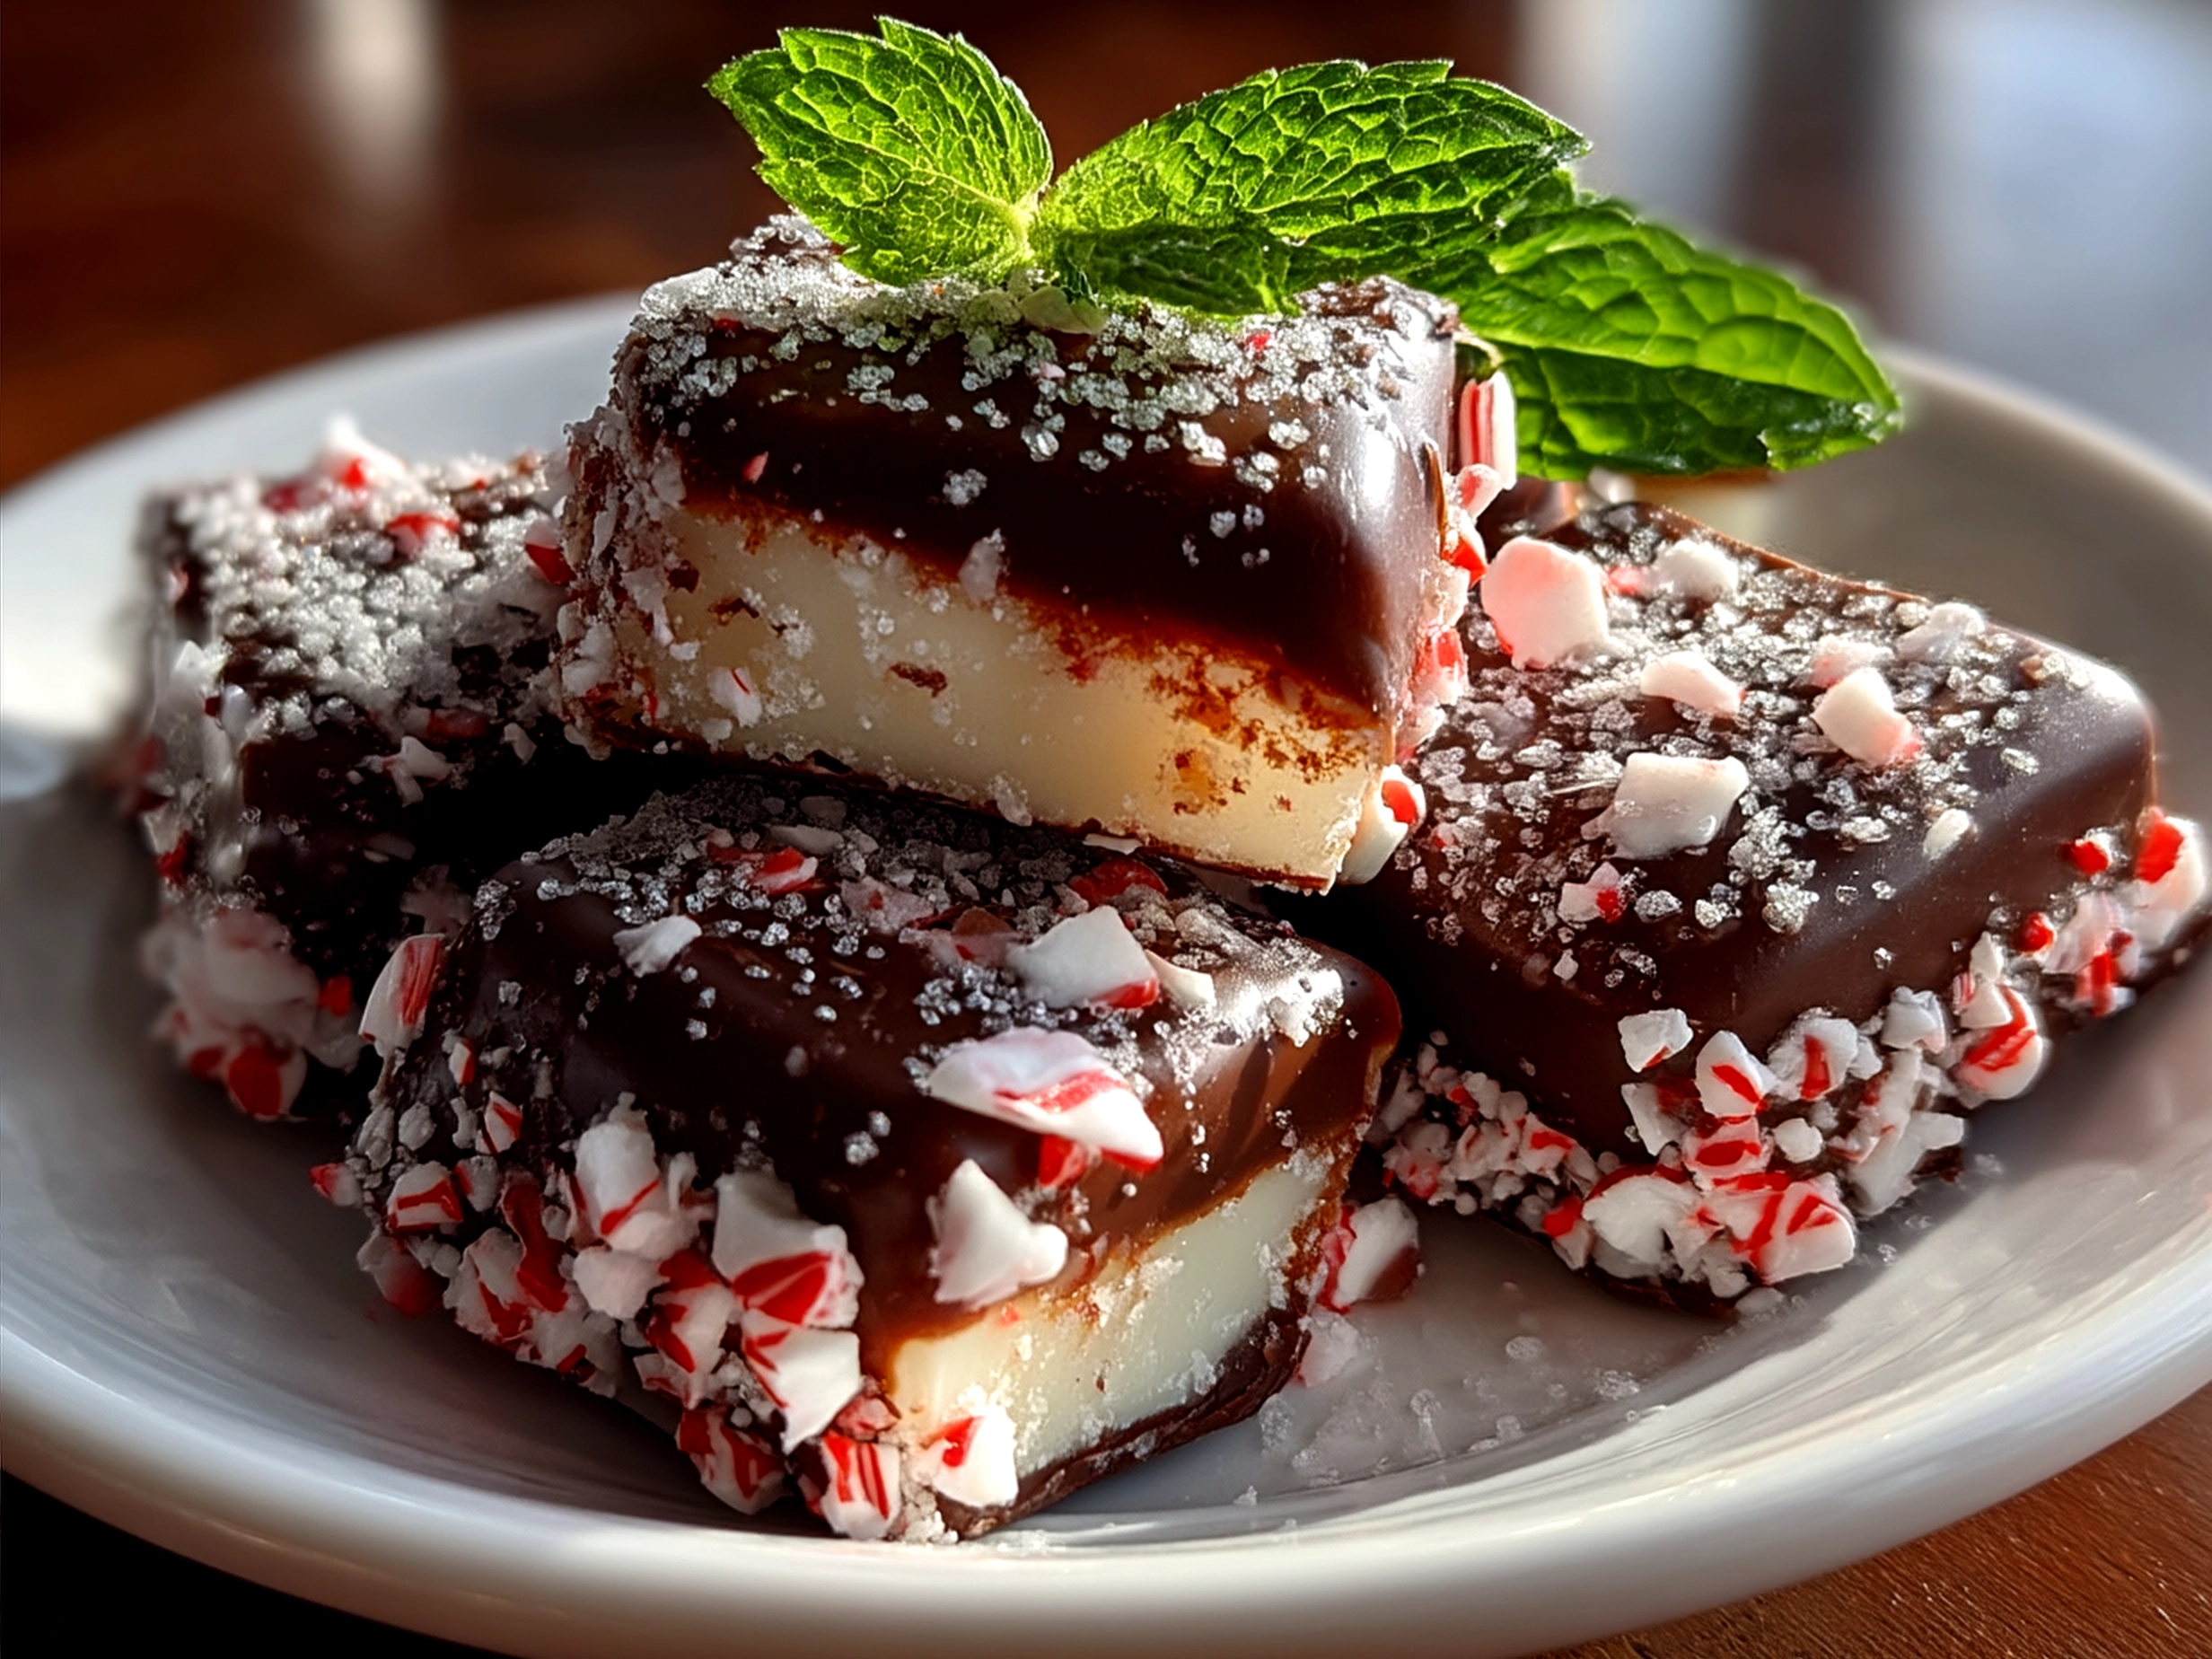
Seasonal flair? During Christmas, I sometimes add crushed candy canes on top or swirl some peppermint confection into melted chocolate, inspired by this quick Peppermint bark delight recipe that saves time and looks impressive.
Guests usually react with surprise, saying things like “Wow, where did you get these?” and “These are the best peppermint sweets I’ve tried.” That’s the kind of reaction makes me happy to keep this recipe on my go-to list.
Your Questions Answered
Can I make this Peppermint Creams ahead of time?
Absolutely! You can prepare these a day or two in advance. Just keep them in an airtight container at room temperature. If you make them earlier, the flavors meld together nicely.
What’s the best substitute for heavy cream in this Peppermint Creams?
Whole milk works fine, but the texture will be a bit lighter. For a dairy-free option, try canned coconut milk, though expect a slight flavor change.
How do I adjust this Peppermint Creams for more or fewer servings?
Simply scale the ingredients up or down in the same proportions. For a bigger batch, I double the recipe and have plenty for sharing or gifting.
Can I add chocolate to my Peppermint Creams?
Yes! Dipping each peppermint sweet in melted dark chocolate adds a delicious layer. Check out this peppermint cream fondant recipe with dark chocolate for ideas.
What if the dough is too sticky?
Add powdered sugar a little at a time to firm it up. It’s easier than starting over and keeps your peppermint confection perfectly smooth.
Can I make these cream-filled peppermint without food coloring?
Definitely. The food coloring is optional and purely for aesthetics. Your Peppermint Creams will taste just as good without it.
How long do Peppermint Creams last?
Stored correctly in a cool, dry spot, they last about a week. In the fridge, they can stretch a bit longer but might harden slightly.
I’ve seen some Peppermint Creams recipes with corn syrup, is it necessary?
Corn syrup helps keep the candies soft and smooth. You can try without it, but your cream-filled peppermint may turn out a little grainy or dry.
What’s the secret to the best peppermint sweets?
Use fresh peppermint extract and don’t rush drying. For some inspiration, visit this Peppermint creams are the perfect sweet treat for the holidays … post that captures the festive spirit perfectly!
Final Thoughts
Peppermint Creams hold a special place in my kitchen because they’re simple, tasty, and bring people together without fuss. My best Peppermint Creams tips: softening your butter well, adding corn syrup for silky texture, and letting the pieces dry properly before storing. These small steps make a big difference in flavor and texture every time.
I’ve tested several variations—from adding chocolate coatings to swirls of crushed candy canes or even coconut flour versions for a gluten-free twist. The most requested by my friends? The classic peppermint confection with red swirls and that unmistakable creamy filling.
I encourage you to make this Peppermint Creams recipe your own. Tweak the peppermint intensity, try dipping in chocolate, or serve with your favorite hot drinks. This candy has a way of making any moment feel just a bit more special.
If you love easy recipes that produce crowd-pleasers, give these a try. You might also enjoy similar ideas like the peppermint bark cups on What A Girl Eats, a great treat for a quick dessert.
Trust me, once you make your first batch of Peppermint Creams, you’ll find yourself reaching for these mint-fresh sweets again and again. Cooking from the heart, with simple ingredients, always wins in the end. Enjoy!
Peppermint Creams

Peppermint Creams are smooth, melt-in-your-mouth candies combining refreshing peppermint flavor with a creamy texture, perfect for a festive treat or a refreshing snack.
- Prep Time: 15 minutes
- Cook Time: 0 minutes
- Total Time: 6 hours 15 minutes
- Yield: 30 servings
- Category: Dessert
- Method: No-Cook
- Cuisine: American
Ingredients
- 2 cups powdered sugar
- 2 tablespoons unsalted butter, softened
- 1 tablespoon light corn syrup
- 2–3 tablespoons heavy cream
- 1/2 teaspoon peppermint extract
- Red food coloring (optional)
- 1 cup dark or semi-sweet chocolate, melted (optional for dipping)
Instructions
- In a mixing bowl, combine powdered sugar, softened butter, and corn syrup until crumbly.
- Add heavy cream and peppermint extract, mixing until a smooth, moldable dough forms. Add more cream if needed.
- If desired, divide the dough and mix red food coloring into one half for a festive look.
- Roll the dough to about 1/4 inch thickness on a powdered sugar-dusted surface.
- Use a small round cookie cutter to cut out shapes and place them on parchment paper.
- Allow the creams to dry at room temperature for 4–6 hours until firm.
- (Optional) Dip each peppermint cream halfway into melted chocolate and place back on parchment paper to set.
- Let the chocolates harden completely before serving or storing in an airtight container.
Notes
For a festive touch, drizzle melted white chocolate over the dipped peppermint creams or add crushed candy canes on top before the chocolate sets.