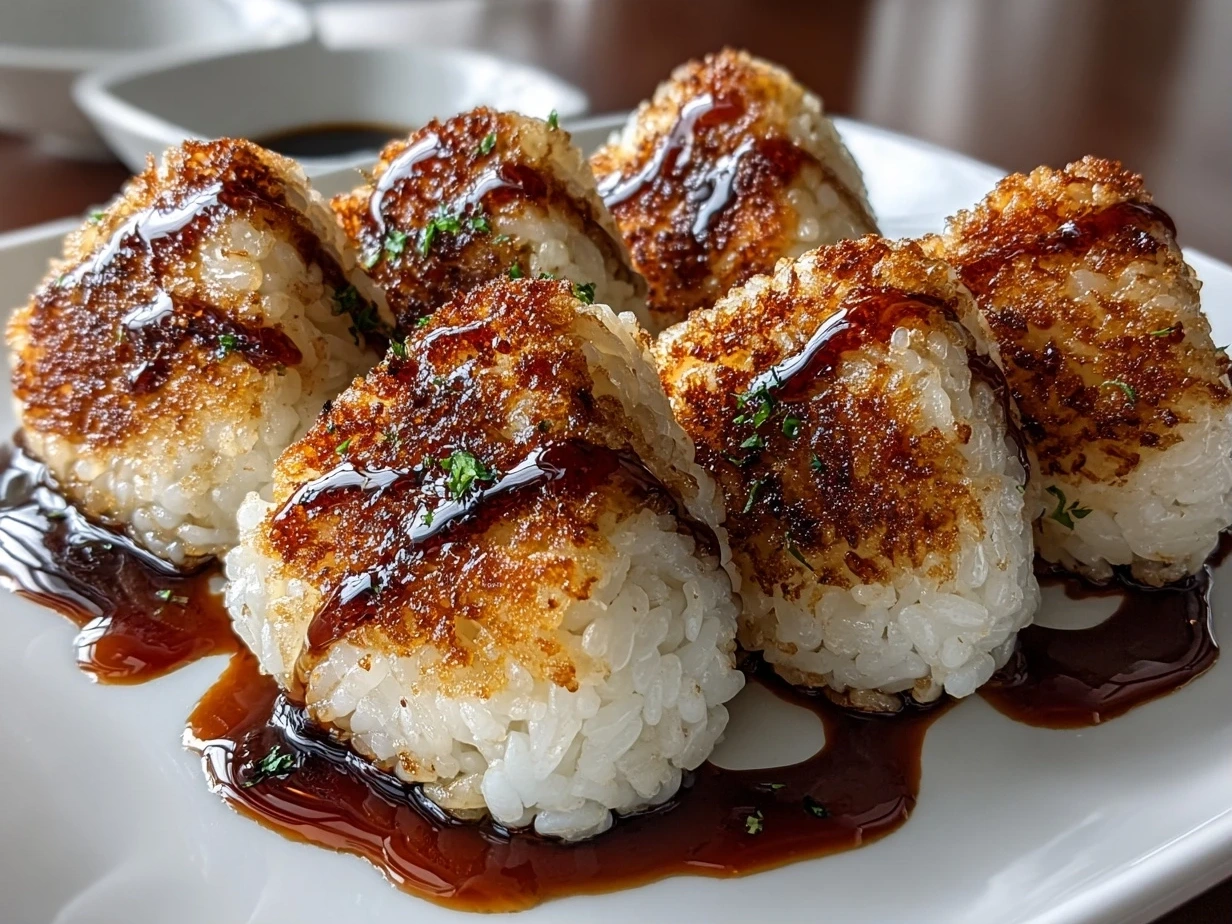
When I first discovered Easy Yaki Onigiri, it was a total game-changer for my weeknight dinners. I remember sitting at a small Japanese café during a trip, watching the chef grill these simple rice balls, brushing them with a savory soy sauce glaze. The crispy edges, the slightly smoky aroma—it was unlike any rice dish I’d tasted before. That moment stuck with me, and back in my own kitchen, I worked on a version that anyone could recreate without any fuss. Since then, Easy Yaki Onigiri has become a staple, especially when I need a quick, satisfying Japanese snack recipe that feels homemade and special.
This dish fits right into real-life cooking because it’s straightforward and uses ingredients that most home cooks already have. It’s perfect for those nights when you want something comforting but don’t want to spend hours cooking. Easy Yaki Onigiri offers that crispy, flavorful bite that pairs well with almost any main, or stands alone as a comforting snack. The best part is how adaptable the grilled rice balls can be with simple onigiri grilling — you can keep it basic with soy sauce onigiri or try fun yakionigiri variations that suit your mood or pantry.
If you’re looking for a delicious, reliable recipe to add to your rotation, Easy Yaki Onigiri is definitely worth a try. It’s approachable for any skill level and guaranteed to bring that satisfying, slightly smoky flavor every time. Let me share the recipe and some tips that turned this Japanese classic into my go-to comfort food.
What You’ll Need:
Here’s what you’ll need for your Easy Yaki Onigiri—simple, affordable ingredients that you can find at your local grocery store or Asian market.
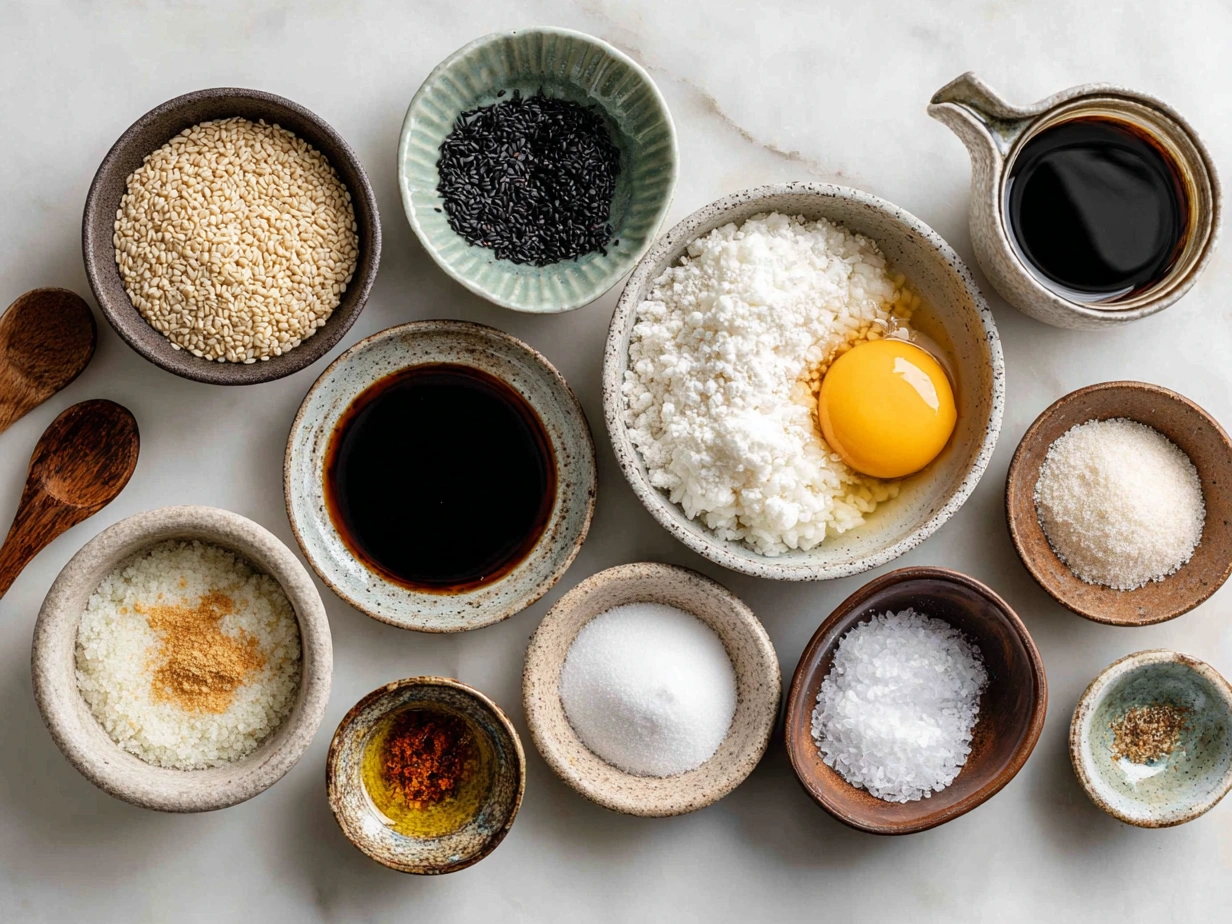
- 2 cups cooked Japanese short-grain rice (preferably slightly cooled)
No problem if you don’t have Japanese rice; medium-grain works in a pinch, but short-grain gives the best stickiness needed for shaping. - 3 tablespoons soy sauce
You can swap for tamari or coconut aminos if you want gluten-free options; these work well for the soy sauce onigiri glaze. - 1 tablespoon mirin (Japanese sweet rice wine)
Found in the Asian aisle; if you don’t have mirin, a pinch of sugar plus a splash of water add a similar sweetness. - 1 tablespoon sesame oil
Adds a nice nutty hint during grilling; you can use vegetable oil but sesame oil brings that authentic touch. - Optional: 1 teaspoon toasted sesame seeds
These make a lovely garnish and add a bit of texture. - Nori sheets, cut into strips (optional)
Wrapping your grilled rice balls in nori gives a traditional look and adds an umami kick.
This Easy Yaki Onigiri is budget-friendly because it relies on pantry staples and leftover rice, making it ideal for everyday cooking. It’s also quick to prepare—if you have rice ready, the whole process from shaping to grilling takes about 20 minutes.
A quick kitchen tip: if you’re making the rice fresh, rinse it well before cooking for the best texture. Leftover rice works perfectly here—it’s actually easier to shape when slightly cooled and a bit dry.
If you have any extras of the soy sauce mixture, store it in an airtight container in the fridge for up to a week. I usually double this glaze so I have some on hand for a quick brush later or to toss with veggies.
Let’s Cook It Together!
Here’s the easiest way I’ve found to make Easy Yaki Onigiri that gets great results every time. From start to finish, it’s about 20-25 minutes, perfect for a quick snack or a side to dinner.
- Prepare Your Rice:
If you haven’t done this already, cook your rice as usual. Let it cool slightly; warm rice is easier to handle but too hot will stick to your hands. - Shape the Rice Balls:
Wet your hands lightly with water mixed with a pinch of salt to prevent sticking. Scoop about half a cup of rice, and gently press it into a compact triangle or oval shape. Don’t pack it too tight; you want it firm but not dense. Make about 6 rice balls from this amount. - Make the Soy Sauce Glaze:
In a small bowl, mix soy sauce, mirin, and sesame oil. This simple mixture is the heart of your soy sauce onigiri flavor. - Heat Your Pan:
Use a non-stick skillet or cast iron over medium heat. Dab a bit of sesame oil to coat the surface—it adds a nice flavor and helps crisp up the edges. - Grill the Rice Balls:
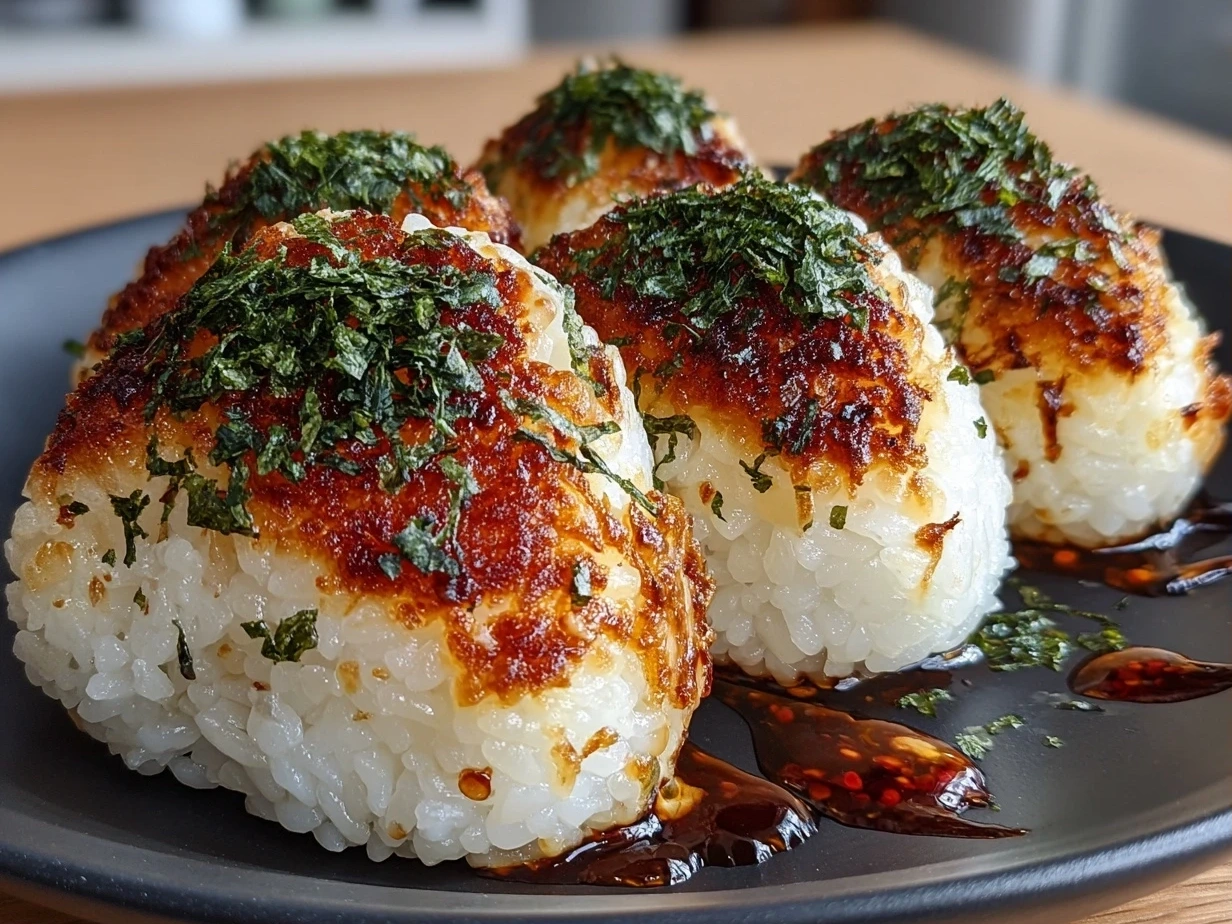
Place the rice balls on the pan. Grill for about 3-4 minutes each side, brushing generously with the soy sauce glaze after the first flip. You want golden brown, slightly crispy edges with that glossy soy sauce shine. - Watch for Crispy Perfection:
If your Easy Yaki Onigiri starts burning or sticks too much, reduce the heat and add a little more oil. Patience here makes all the difference to get that perfect char without drying them out. - Optional Nori Wrap:
Once grilled, wrap a piece of nori around the rice ball if you like. It adds a nice crispy and flavorful contrast.
While these grill, your kitchen fills with that savory aroma that promises a comforting treat. This step-by-step makes the process feel doable, not intimidating, even if you don’t grill rice balls often.
If you want to try a shortcut, you can brush the glaze and broil the rice balls for 2-3 minutes on each side instead of pan grilling. It’s less hands-on but still tasty.
Let this recipe simmer in your mind next time you want to try an easy grilled rice balls recipe that’s full of flavor but friendly for everyday cooking.
How to Serve & Enjoy It!
Easy Yaki Onigiri shines on its own as a hot Japanese snack recipe or alongside dishes like miso soup or steamed veggies. I often serve it with pickled cucumbers or a fresh salad like this Fresh Beet Salad (a great health boost you can find at dumafoods.com) to balance the rich soy flavor.
This dish is perfect for casual gatherings, packed lunches, or even light dinners. On chillier nights, the warm, savory grilled rice balls are like a warm hug in edible form.
I like to present Easy Yaki Onigiri on a wooden board with small bowls of extra soy sauce or chili flakes for dipping. A sprinkle of toasted sesame seeds on top adds a lovely look and flavor.
Leftovers? No worries. Reheat in a pan to keep the crispness, or pop in the toaster oven. You can also slice them up and toss in a stir-fry or soup, giving new life to last night’s snack.
For a fun seasonal twist, try adding yuzu kosho in the glaze for a citrusy heat or mix cooked mushrooms into the rice before shaping for an earthy variation.
Guests usually ask how you get that crispy, beautifully browned texture. That’s the simple onigiri grilling magic at work!
If your family loves this, they’ll also enjoy this Brazilian Mounjaro Recipe Delight for another flavorful, crowd-pleasing dish.
Your Questions Answered
I get asked a lot about making Easy Yaki Onigiri at home. Here are some answers I’ve picked up after many batches:
- Can I make Easy Yaki Onigiri ahead of time?
Yes! You can form the rice balls in advance and keep them wrapped in plastic wrap in the fridge for a few hours. Grill them fresh before serving for the best texture. - What if I don’t have mirin?
A simple swap is a teaspoon of sugar or honey mixed with a tablespoon of water; this mimics the sweetness and moisture well. - How sticky does the rice need to be?
Short-grain Japanese rice works best because it’s naturally sticky. Using leftover rice works great too – it firms up slightly, making shaping easier. - Can I freeze Easy Yaki Onigiri?
Absolutely. Freeze them individually wrapped and then reheat in a skillet or toaster oven. Don’t add the soy sauce glaze before freezing; brush it on when reheating. - Are there other yakionigiri variations I can try?
Try adding fillings like grilled salmon flakes or pickled plum (umeboshi). You can also experiment with different sauces like miso glaze or spicy gochujang. - My rice balls fall apart while grilling; what should I do?
Make sure you’re pressing the rice firmly but gently. If needed, dampen your hands or wrap the grill pan with a lid and gently press each rice ball while cooking. - Is it necessary to use a grill pan?
You can use a regular non-stick skillet or cast iron pan for simple onigiri grilling. For a smoky char, a grill pan works great, but it’s not essential.
If you want more inspiration on grilled rice balls and authentic techniques, check out this detailed Yaki Onigiri (Grilled Rice Balls) | 焼きおにぎり – Okonomi Kitchen resource or this Crispy Yaki Onigiri discussion on Reddit.
Final Thoughts
Easy Yaki Onigiri holds a special spot in my recipe collection because it’s effortless but delivers big on flavor. Whether it’s a quick snack or part of a laid-back meal, it feels comforting and satisfying.
My Best Easy Yaki Onigiri Tips:
- Use slightly cooled short-grain rice for the best shaping and texture.
- Don’t rush the grilling—patience helps develop that perfect crispy crust.
- Experiment with yakionigiri variations like adding miso glaze or fillings for fun twists.
I’ve tested versions with salmon flakes inside, a miso glaze instead of soy sauce, and even a spicy chili-soy combination. The classic soy sauce onigiri, however, gets requested most often, especially for family meals and casual get-togethers.
I hope you find this recipe both inviting and easy enough to make your own. With just a few ingredients and basic kitchen tools, you have a Japanese snack recipe that impresses without stress. Give it a try soon—you’ll love how dependable and delicious Easy Yaki Onigiri is in your everyday cooking.
For more straightforward recipes that bring comfort and flavor, check out my Christmas Breakfast Casserole or visit dumafoods.com for other trusty favorites. Happy cooking!
Easy Yaki Onigiri
Easy Yaki Onigiri are crispy, grilled Japanese rice balls brushed with savory soy sauce, perfect as a snack or light meal. This simple recipe delivers authentic flavors with minimal ingredients and effort.
- Prep Time: 10 minutes
- Cook Time: 10 minutes
- Total Time: 20 minutes
- Yield: 4 servings
- Category: Snack
- Method: Grilled
- Cuisine: Japanese
Ingredients
- 2 cups cooked Japanese short-grain rice
- 2 tablespoons soy sauce
- 1 tablespoon mirin (optional)
- 1 teaspoon sesame oil or vegetable oil
- Salt, to taste
- Optional fillings: pickled plum (umeboshi), salted salmon flakes, or tuna mayo
Instructions
- Prepare Japanese short-grain rice according to package instructions and let it cool slightly until warm.
- Lightly salt your hands and shape the rice into triangular or round rice balls, optionally adding your choice of filling in the center.
- Heat a non-stick skillet or grill pan over medium heat and brush with oil.
- Place the rice balls on the pan and cook for about 3-4 minutes on each side until a golden, crispy crust forms.
- Mix soy sauce and mirin in a small bowl, then brush this mixture over the rice balls while grilling, turning carefully to coat all sides evenly.
- Once nicely grilled and caramelized, remove from heat and serve warm.
Notes
For extra flavor, try wrapping the finished onigiri with a strip of toasted nori seaweed before serving.