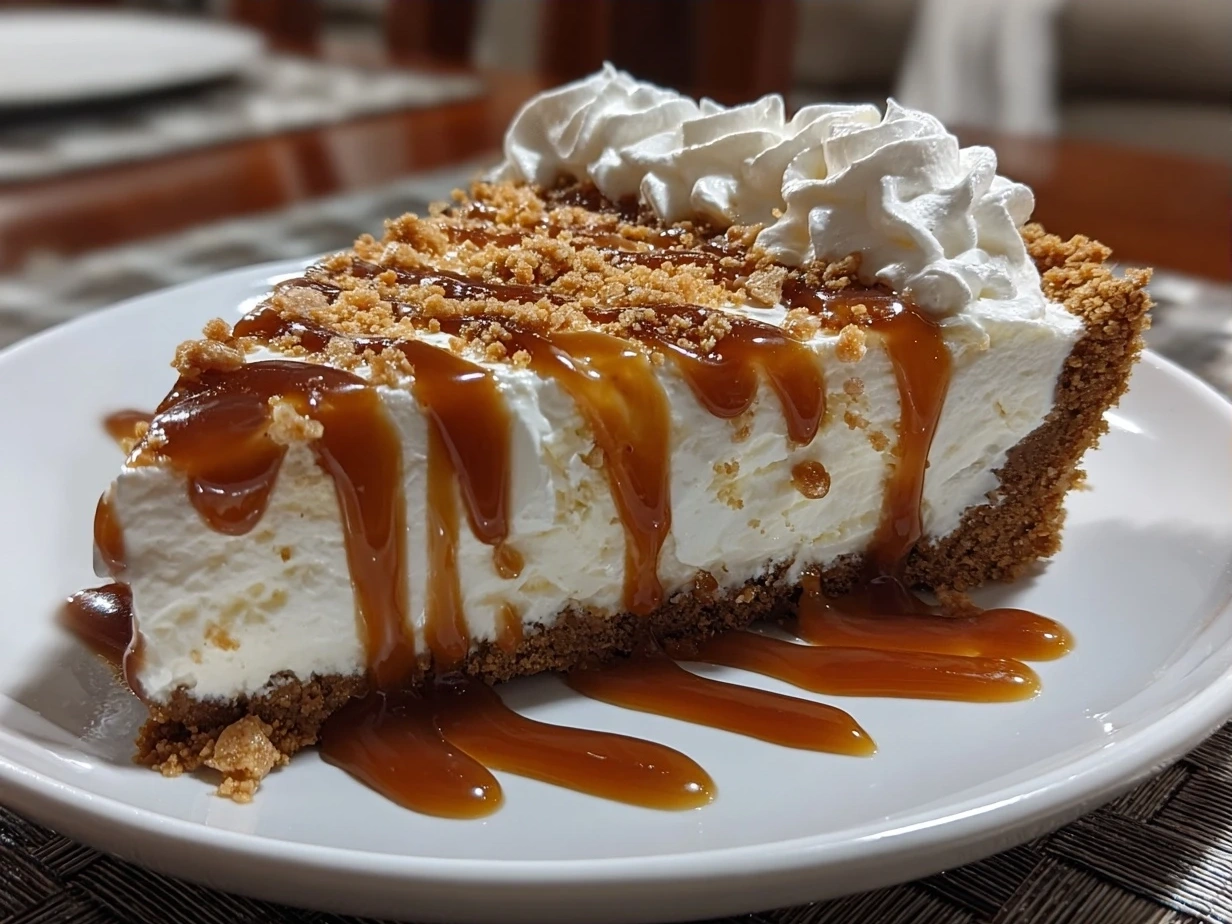
Peanut Butter Pie has a way of sneaking into my life and becoming an instant favorite, no matter the occasion. The first time I tasted a creamy peanut butter pie, it was at a neighbor’s summer BBQ. I remember the rich, velvety texture and just the right balance between sweet and nutty—it felt like a special treat made with love. From that moment on, I knew this peanut butter dessert belonged in my kitchen rotation.
What I love most about this peanut butter pie is how it fits so naturally into real-life cooking and gatherings. It’s easy to prepare and doesn’t require fancy ingredients or complicated steps. Whether I’m hosting a casual get-together or looking for a sweet finish to a weeknight dinner, this pie is a reliable crowd-pleaser that everyone digs into with big smiles.
I also appreciate how flexible it is, especially if you need a no-bake peanut butter pie on busy days. For me, it’s the kind of creamy peanut butter pie that feels indulgent but still approachable—no one has to be a dessert expert to nail it.
If you’re a fellow cook on the lookout for a peanut butter pie recipe that you can count on, you’re in the right spot. I’ll guide you through everything from what you’ll need to how to bring this dessert together simply and successfully. You’ll find tips to save time, tricks for perfect texture, and ideas to make it your own. Let’s make this peanut butter pie your new go-to dessert!
What You’ll Need:
You only need a handful of ingredients to make this peanut butter pie taste fantastic. Here’s the list that keeps this peanut butter pie recipe simple and wallet-friendly:
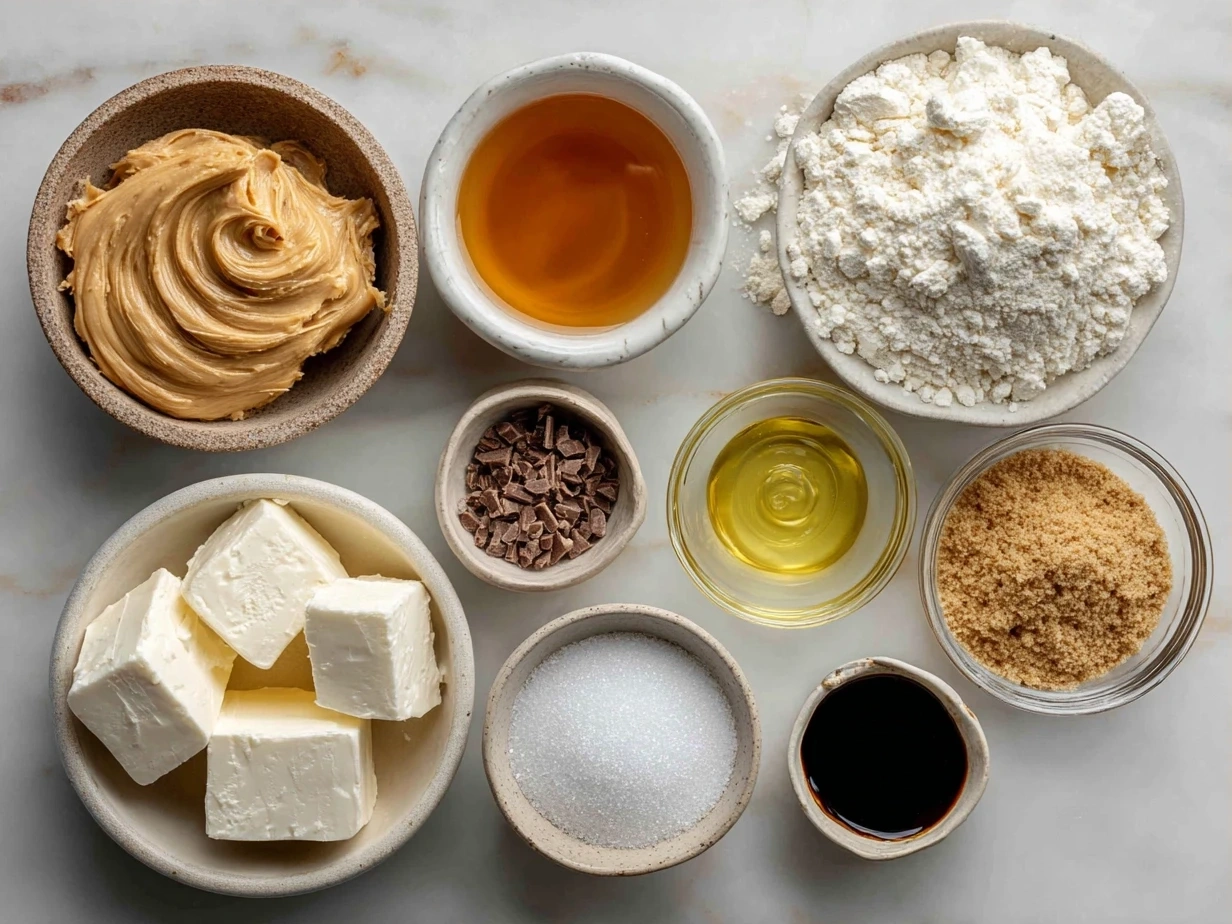
- 1 ½ cups graham cracker crumbs (store-bought or homemade, for the crust)
- 6 tablespoons unsalted butter, melted – no problem if you want to use margarine or coconut oil here; I’ve tried both with good results
- 1 cup creamy peanut butter (look for natural or regular, whichever you prefer)
- 1 ½ cups powdered sugar – you can substitute half with brown sugar for a deeper flavor
- 1 8-ounce package cream cheese, softened – if you don’t have cream cheese, Greek yogurt works in a pinch, though the texture will be different
- 1 8-ounce tub whipped topping (like Cool Whip) or freshly whipped heavy cream
- 1 teaspoon vanilla extract – you’ll find this in the baking aisle, so no extra trip needed
- Optional: chocolate chips or chopped peanuts for garnish
This peanut butter pie is budget-friendly because most of these ingredients are pantry staples you probably already have on hand. If you’re worried about time, pre-crushed graham cracker crumbs save a lot of prep effort.
When making this peanut butter pie, my secret is adding a bit extra peanut butter—about 2 tablespoons more than the recipe calls for. It ups the flavor without making the texture too heavy. And if you have any leftover whipped topping or peanut butter, just cover and refrigerate them for another use within a week.
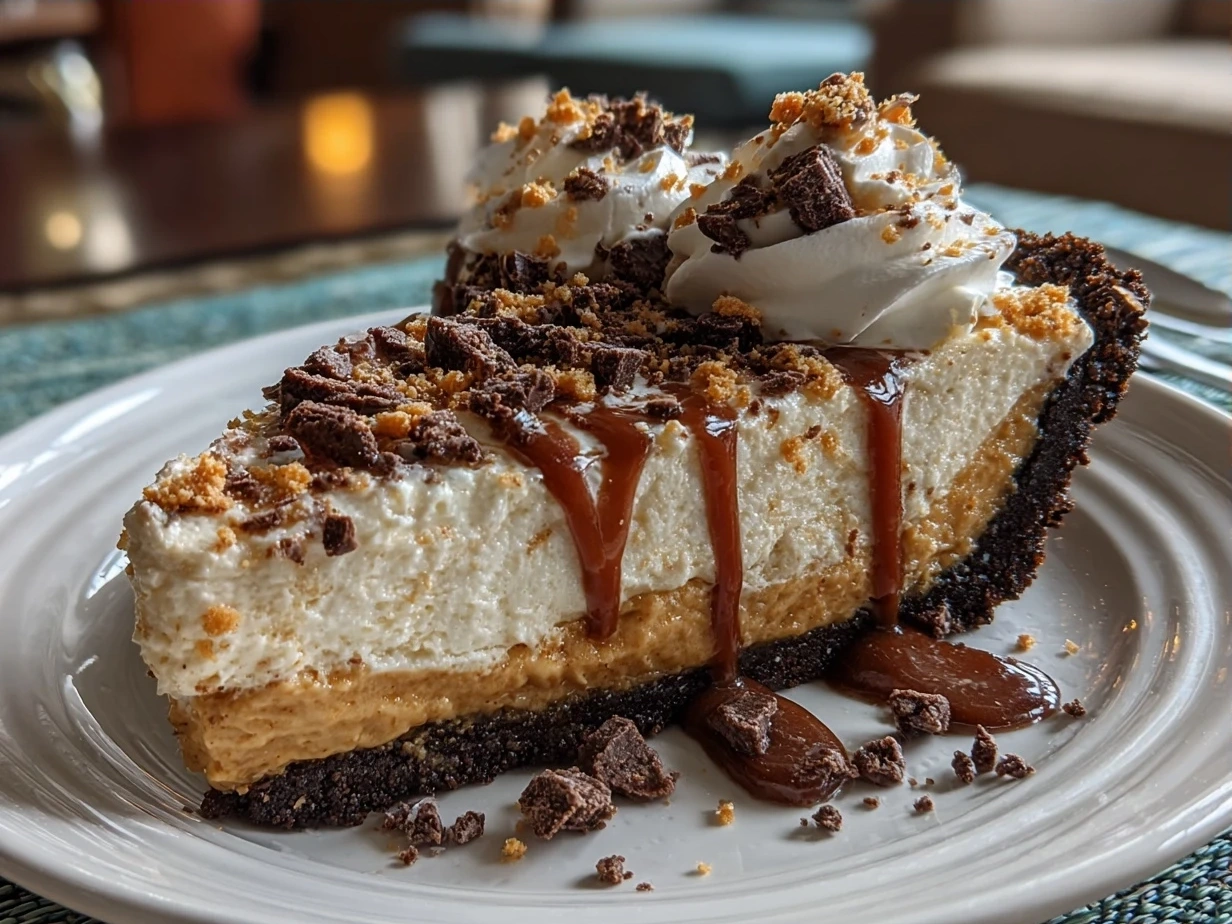
If you want a flavor twist, swap the graham cracker crust for a chocolate cookie crust to serve as a rich base for your creamy peanut butter pie. Since this recipe is no-bake, all you need is a quick chill in the fridge to set things right.
Let’s Cook It Together!
Here’s the step-by-step guide to making a peanut butter pie that’s creamy, dreamy, and downright addicting. From start to finish, this peanut butter pie takes me about 20 minutes to prepare—not counting chilling time.
- Start with the crust: Mix your graham cracker crumbs with the melted butter in a medium bowl. Press this mixture firmly into the bottom and slightly up the sides of a 9-inch pie dish. I use the bottom of a glass or measuring cup to get it packed tight and even.
- Set the crust aside: Pop it in the fridge while you make the filling. This makes the crust hold its shape better once the filling goes in.
- Whip the cream cheese and peanut butter: In a large bowl, beat the softened cream cheese with creamy peanut butter until smooth and creamy. This is your flavor base—if you rush it, you risk little lumps, so take a minute to get it just right.
- Add powdered sugar and vanilla: Slowly mix in the powdered sugar and vanilla extract. The filling should thicken a bit here. Your kitchen will start smelling pretty amazing—the peanut butter aroma fills the air.
- Fold in whipped topping: Gently fold in the whipped topping or whipped cream using a spatula, keeping as much air in the mixture as possible. This step makes the peanut butter pie light and fluffy while still creamy.
- Assemble the pie: Pour the filling over your chilled crust and smooth out the top with your spatula.
- Chill: Cover the pie with plastic wrap and refrigerate for at least 4 hours, ideally overnight. This step allows everything to set up nicely. If your peanut butter pie looks a bit soft right after spreading, don’t worry—it firms up beautifully while chilling.
- Add garnish: Just before serving, sprinkle the top with chocolate chips, chopped peanuts, or even a drizzle of melted chocolate to make it extra special.
A pro kitchen tip: While your peanut butter pie is chilling, you can clean up your workspace or prep other dishes. This no-bake peanut butter pie is forgiving but worth the patience.
From my experience, if you’re making this for a crowd, doubling the recipe works well—and I usually make two pies to cover any peanut butter pie emergencies.
How to Serve & Enjoy It!
This creamy peanut butter pie shines as a dessert for all kinds of occasions. I often serve it chilled straight from the fridge on casual weeknight dinners or when friends drop by unexpectedly. It’s so easy to slice and share, making it a hit every time.
Pairing this peanut butter dessert with fresh berries or a scoop of vanilla ice cream adds a bright contrast that balances the richness perfectly. I’ve also served it alongside a fresh green salad and roasted veggies for a full meal that ends on a sweet note without being overwhelming.
One of my favorite occasions for the peanut butter pie is fall gatherings. Its rich flavor and no-fuss prep make it an easy switch when you want something sweet but simple. Presentation is key here. A few whole peanuts sprinkled on top or a whipped cream rosette turns this pie from everyday dessert to something guests talk about.
If you have leftovers, wrap them tightly and keep refrigerated. Leftover peanut butter pie makes a great snack the next day or a quick sweet bite with a cup of coffee. I’ve tried freezing slices too, and while it’s still tasty, the texture softens a bit once thawed.
If you want to mix it up seasonally, adding a layer of chocolate ganache on top creates a lovely twist and reminds me of this chocolate peanut butter pie recipe from The Pioneer Woman. It’s a crowd-pleaser for those with a chocoholic streak.
Your Questions Answered
Here’s what I get asked most about this easy peanut butter pie—and the honest answers from my kitchen:
- Can I make this peanut butter pie ahead of time? Absolutely! In fact, this pie often tastes better after sitting overnight because the flavors blend and the filling firms up nicely.
- What’s the best substitute for cream cheese? Greek yogurt is a decent swap if you want a lighter version, though it changes texture a bit. Some cooks have tried mascarpone for extra creaminess.
- How do I adjust this peanut butter pie recipe for more servings? Doubling the entire recipe works great, just use a larger pie dish or two regular ones. For smaller servings, try mini pie tins or even use this recipe as a filling for peanut butter cupcake toppers.
- Can I make a no-bake peanut butter pie with crunchy peanut butter? Yes, but keep in mind the crunch will change the filling’s texture, making it less creamy. Some cooks like the added texture, so it depends on personal preference.
- Is it okay to use natural peanut butter? Definitely. It might add a little more oiliness, so make sure it’s well stirred before measuring.
- How do I keep the crust from getting soggy? Chilling the crust before adding the filling helps. You can also brush the crust lightly with melted chocolate and chill it again before filling to create a moisture barrier.
- Any tips for making this peanut butter pie more kid-friendly? Use less powdered sugar for a milder sweetness and top with fun sprinkles or mini chocolate candies to make it appealing to little ones.
This peanut butter pie has been a staple in my dessert lineup after testing different methods. If you’d like to explore more no-bake peanut butter pie recipes for variations, check out this easy peanut butter pie recipe for some simple twists that work well.
Final Thoughts
This peanut butter pie holds a special place in my recipe collection because it’s reliable, easy, and loved by everyone I serve it to. It’s the kind of dessert that gets requested again and again—not just for big gatherings but even quiet nights at home.
My Best Peanut Butter Pie Tips:
- Use fully softened cream cheese for a smooth, lump-free filling.
- Give the filling plenty of time to chill—it makes all the difference in texture.
- Adding a little extra peanut butter amps up the flavor without making the pie heavy.
Over the years, I’ve tested versions with a chocolate cookie crust, whipped cream instead of Cool Whip, and a topping of salted caramel. My chocolate peanut butter pie version is the most-requested in our family—a real winner when you want a richer dessert.
This peanut butter pie recipe is here to be part of your everyday cooking, celebrations, or when you just need a sweet pick-me-up. Give it a try and tweak it to your taste. I hope you’ll enjoy the creamy, comforting richness this pie brings to your table as much as I do.
For other recipe ideas that bring simple, delicious dishes to your cooking, you might want to check out Simanim Stuffed Butternut Squash or the Butternut Squash Apple Coffee Cake for easy comfort food options. And if you love rich desserts, this Brown Butter Cheesecake is a must-try.
If you want to see other people’s takes on no-bake peanut butter pie, I like the step-by-step clarity from The BakerMama’s no-bake peanut butter pie guide—it’s a great resource.
You’ve got this! Making peanut butter pie is a delicious and doable journey. Have fun in your kitchen and enjoy every creamy bite.
Peanut Butter Pie

This creamy Peanut Butter Pie combines rich peanut butter flavor with a smooth, fluffy filling set in a crunchy graham cracker crust, perfect for any dessert lover.
- Prep Time: 15 minutes
- Cook Time: 0 minutes
- Total Time: 4 hours 15 minutes
- Yield: 8 servings
- Category: Dessert
- Method: No-Cook
- Cuisine: American
Ingredients
- 1 1/2 cups graham cracker crumbs
- 1/4 cup sugar
- 6 tablespoons unsalted butter, melted
- 1 cup creamy peanut butter
- 8 oz cream cheese, softened
- 1 cup powdered sugar
- 1 1/2 cups heavy cream
- 1 teaspoon vanilla extract
- Chopped peanuts or chocolate shavings (optional, for garnish)
Instructions
- In a medium bowl, mix graham cracker crumbs, sugar, and melted butter until well combined. Press mixture into the bottom and up the sides of a 9-inch pie plate. Chill in the refrigerator for 30 minutes.
- In a large bowl, beat the cream cheese and peanut butter together until smooth and creamy.
- Add powdered sugar and vanilla extract to the peanut butter mixture, mixing until fully incorporated.
- In a separate bowl, whip the heavy cream until stiff peaks form.
- Gently fold the whipped cream into the peanut butter mixture until smooth and fluffy.
- Pour the filling into the prepared crust and smooth the top.
- Refrigerate the pie for at least 4 hours, or until firm.
- Before serving, garnish with chopped peanuts or chocolate shavings if desired.
Notes
For a lighter version, substitute half of the heavy cream with whipped topping or use a reduced-fat cream cheese. Chill the pie overnight for the best texture.